Wazuh Alerts to Micrsoft Teams integration [PowerAutomate Workflows]

ℹ️ Incoming Webhooks in Microsoft Teams (Office 365 Connectors) will be fully retired by December 2025.
- New Incoming Webhook/Connector creation is blocked from August 15, 2024.
- Existing connectors will require an URL update before December 31, 2024 to keep working.
- All Office 365 connectors/incoming webhook integrations will stop working entirely after December 31, 2025 (see Microsoft's announcement).
This integration exists because Power Automate Workflows are now the Microsoft-recommended way to post alerts to Teams.
A comprehensive integration script that sends Wazuh security alerts directly to Microsoft Teams channels using Power Automate workflows. This integration supports modern Microsoft Teams webhooks and provides rich, formatted alert notifications with Adaptive Cards.
Features
- 🔗 Power Automate Integration: Uses modern Microsoft Teams Power Automate workflows (logic.azure.com)
- 🎨 Rich Formatting: Adaptive Cards with color-coded priority levels and detailed alert information
- 🎯 Flexible Filtering: Configure alerts by rule ID, severity level, or both
- 🚀 Easy Setup: Simple installation and configuration process
Alert Information Included
Each Teams notification includes:
- Level: With color coding
- Rule ID: Wazuh rule identifier
- Description: Rule description
- Agent: Agent name
- Timestamp: Alert time (local timezone)
- Full Log: Complete log entry
- Dashboard Link: Direct link to the Wazuh Dashboard Threat Hunting section for the agent that generated the alert (configurable)
Requirements
System Requirements
- Wazuh Manager: Version 4.0 or higher
- Python: Version 3.8 or higher (usually included with Wazuh)
- Network: HTTPS access to
logic.azure.com(Power Automate)
Microsoft Teams Requirements
- Microsoft Teams workspace with channel creation permissions
- Power Automate Free access (included in most Microsoft 365 plans)
Installation
Step 1: Download Integration Files
Download the integration files to your Wazuh manager:
# Create a temporary directory
cd /tmp
# Download scripts
wget https://raw.githubusercontent.com/jayzielinski/wazuh-teams-workflows/main/custom-teams
wget https://raw.githubusercontent.com/jayzielinski/wazuh-teams-workflows/main/custom-teams.py
Step 2: Install Integration Scripts
Copy the files to the Wazuh integrations directory and set proper permissions:
# Copy files to Wazuh integrations directory
sudo cp custom-teams /var/ossec/integrations/
sudo cp custom-teams.py /var/ossec/integrations/

# Set proper ownership and permissions
sudo chown root:wazuh /var/ossec/integrations/custom-teams
sudo chmod 750 /var/ossec/integrations/custom-teams
sudo chown root:wazuh /var/ossec/integrations/custom-teams.py
sudo chmod 750 /var/ossec/integrations/custom-teams.py

# Verify installation
ls -la /var/ossec/integrations/
Expected output:
-rwxr-x--- 1 root wazuh  444 Jul 28 19:00 /var/ossec/integrations/custom-teams
-rwxr-x--- 1 root wazuh 7274 Jul 28 19:00 /var/ossec/integrations/custom-teams.py
Step 3. Edit the Dashboard URL in custom-teams.py
ℹ️ Important:
After copying the integration script, you MUST update the link to your Wazuh Dashboard in the notification card.
This ensures that the "Dashboard" button in Teams alerts correctly points to your environment.
How to update the Dashboard link
- Open the integration script for editing:
sudo nano /var/ossec/integrations/custom-teams.py
- Find the Adaptive Card
actionssection
(inside the_make_cardfunction):
"actions": [{
"type": "Action.OpenUrl",
"title": "Dashboard",
"url": "https://your.wazuh.dashboard.ip/app/threat-hunting#/overview/?tab=general&tabView=events&_a=(filters:!(),query:(language:kuery,query:''))&_g=(filters:!(),refreshInterval:(pause:!t,value:0),time:(from:now-24h,to:now))&agentId={agent.get('id','')}"}]
- Replace
your.wazuh.dashboard.ipwith your Dashboard's IP address or DNS name. For example:
"url":f"https://192.168.69.50/app/threat-hunting#/overview/?tab=general&tabView=events&_a=(filters:!(),query:(language:kuery,query:''))&_g=(filters:!(),refreshInterval:(pause:!t,value:0),time:(from:now-24h,to:now))&agentId={agent.get('id','')}"}]
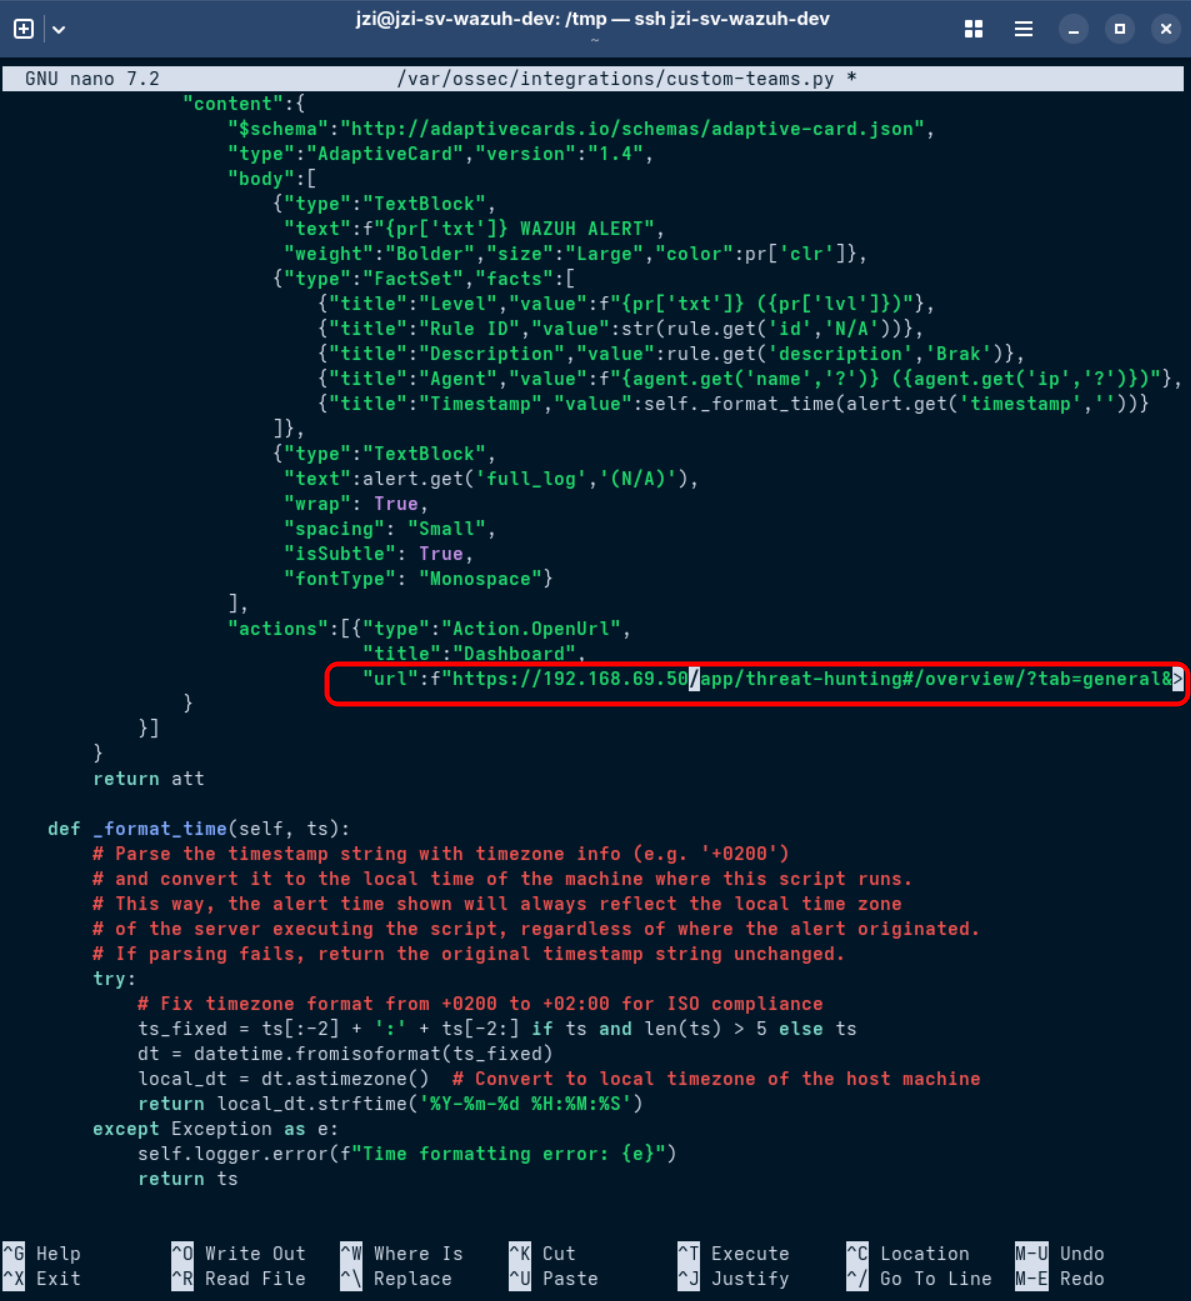 4. Save the file and restart Wazuh Manager for the changes to take effect:
sudo systemctl restart wazuh-manager
Microsoft Teams Configuration
Step 1: Create Power Automate Workflow
-
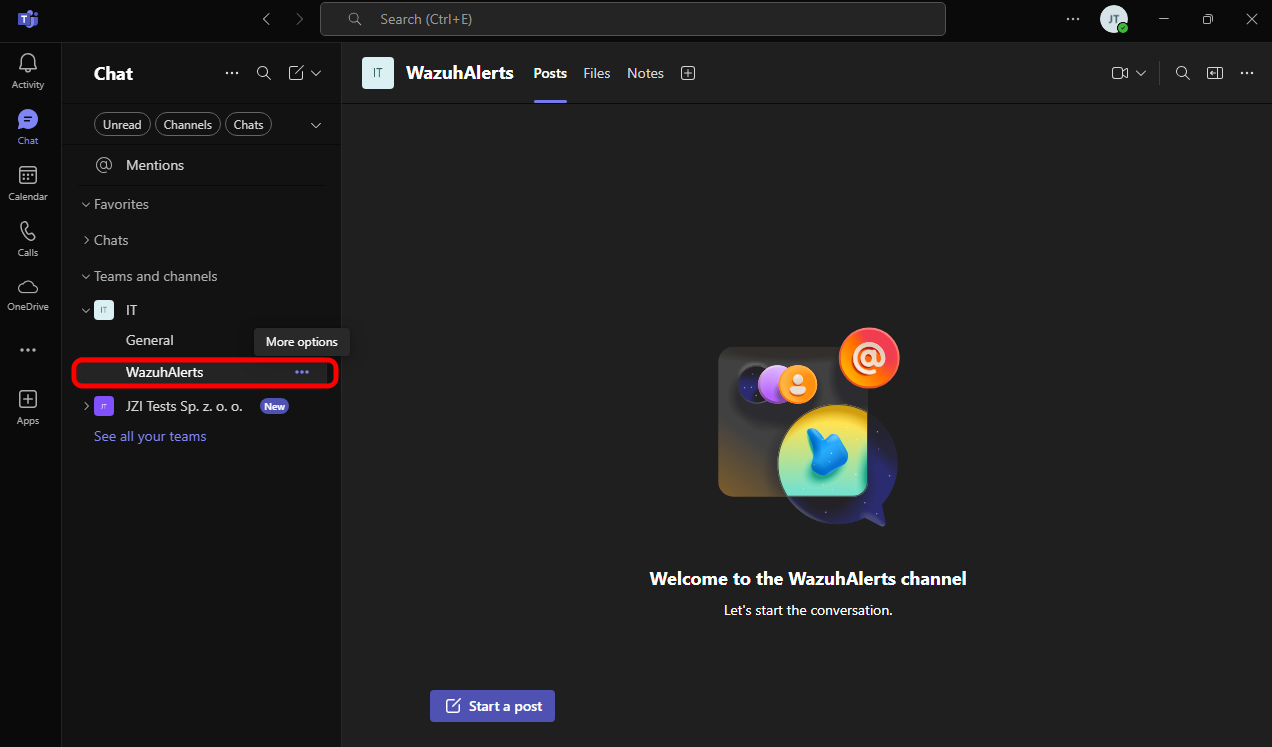
Navigate to your Teams channel
- Open Microsoft Teams
- Go to the channel where you want to receive alerts
- Click the three dots (...) next to the channel name
-
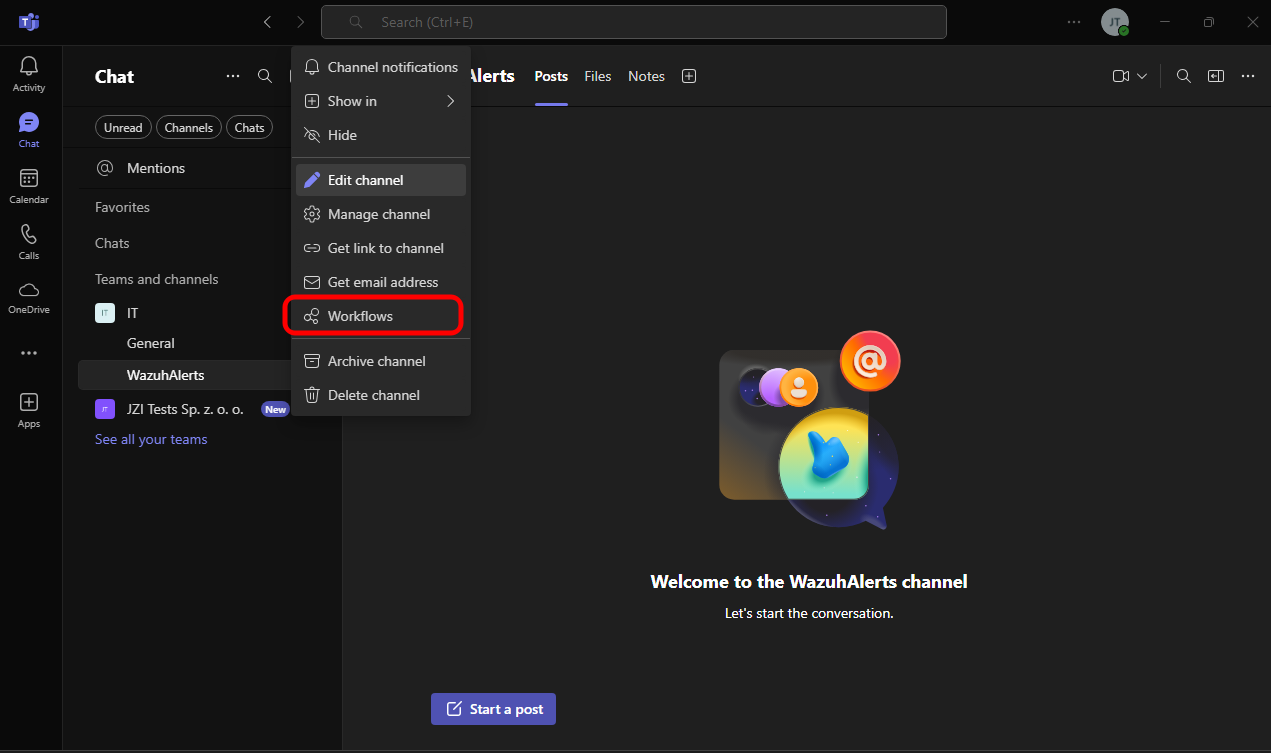
Add Workflow
-
Select "Workflows" from the dropdown menu
-
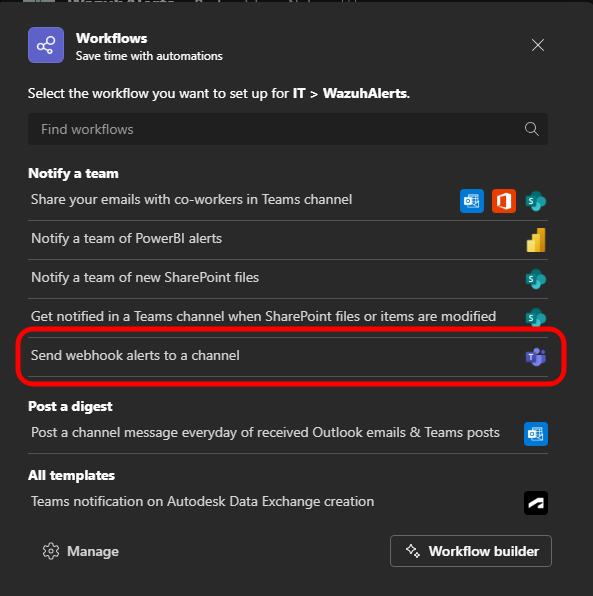
Click "Send webhook alerts to a channel"
-
-
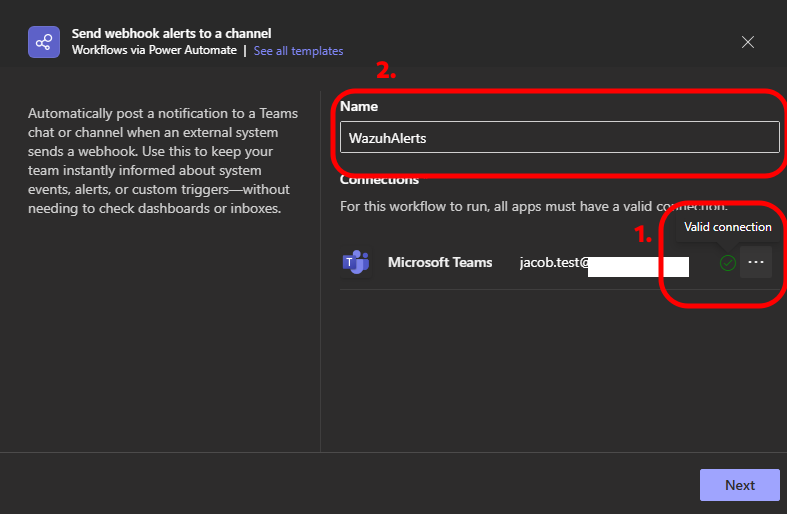
Wait until the connection status changes to “Valid connection” and change the “Name” of the workflow. Click Next.
-
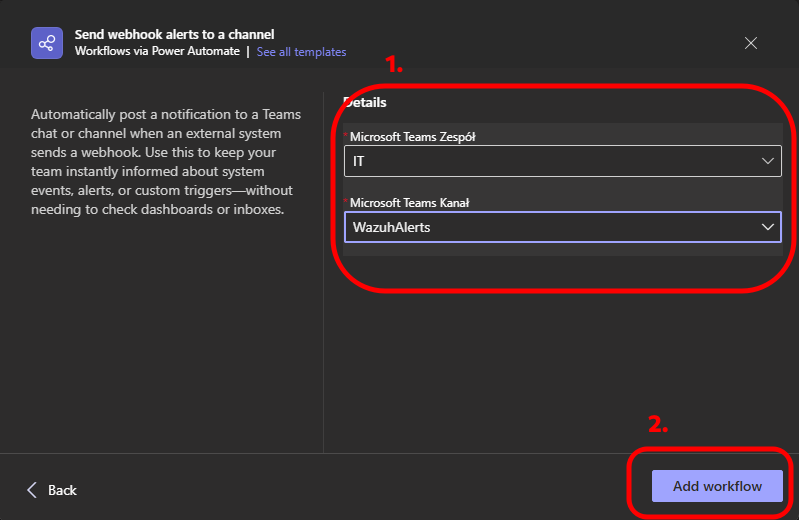
Configure Workflow
- Team: Select your team
- Channel: Select your channel
Click "Add workflow"
-
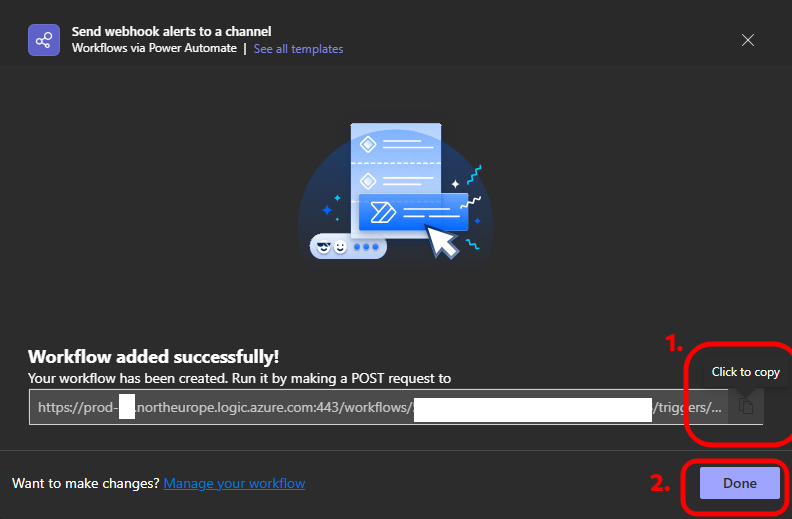
Copy Webhook URL
- After creation, copy the generated webhook URL
- It should look like:
https://prod-XX.northeurope.logic.azure.com:443/workflows/... - Important: Save this URL securely as you'll need it for Wazuh configuration
- Click "Done"
Wazuh Configuration
Step 1: Configure ossec.conf
Edit the Wazuh configuration file:
sudo nano /var/ossec/etc/ossec.conf
Add the integration configuration.
ℹ️ You can enable notifications both for all alerts above a specified level and for selected specific rule IDs at the same time. For example, it’s possible to receive Teams notifications for all critical alerts (e.g., level ≥ 11) and, simultaneously, for any alerts matching a list of specific rule IDs
Basic Configuration (All alerts level 10+)
<integration>
  <name>custom-teams</name>
  <hook_url>YOUR_TEAMS_WEBHOOK_URL_HERE</hook_url>
  <level>10</level>
  <alert_format>json</alert_format>
</integration>
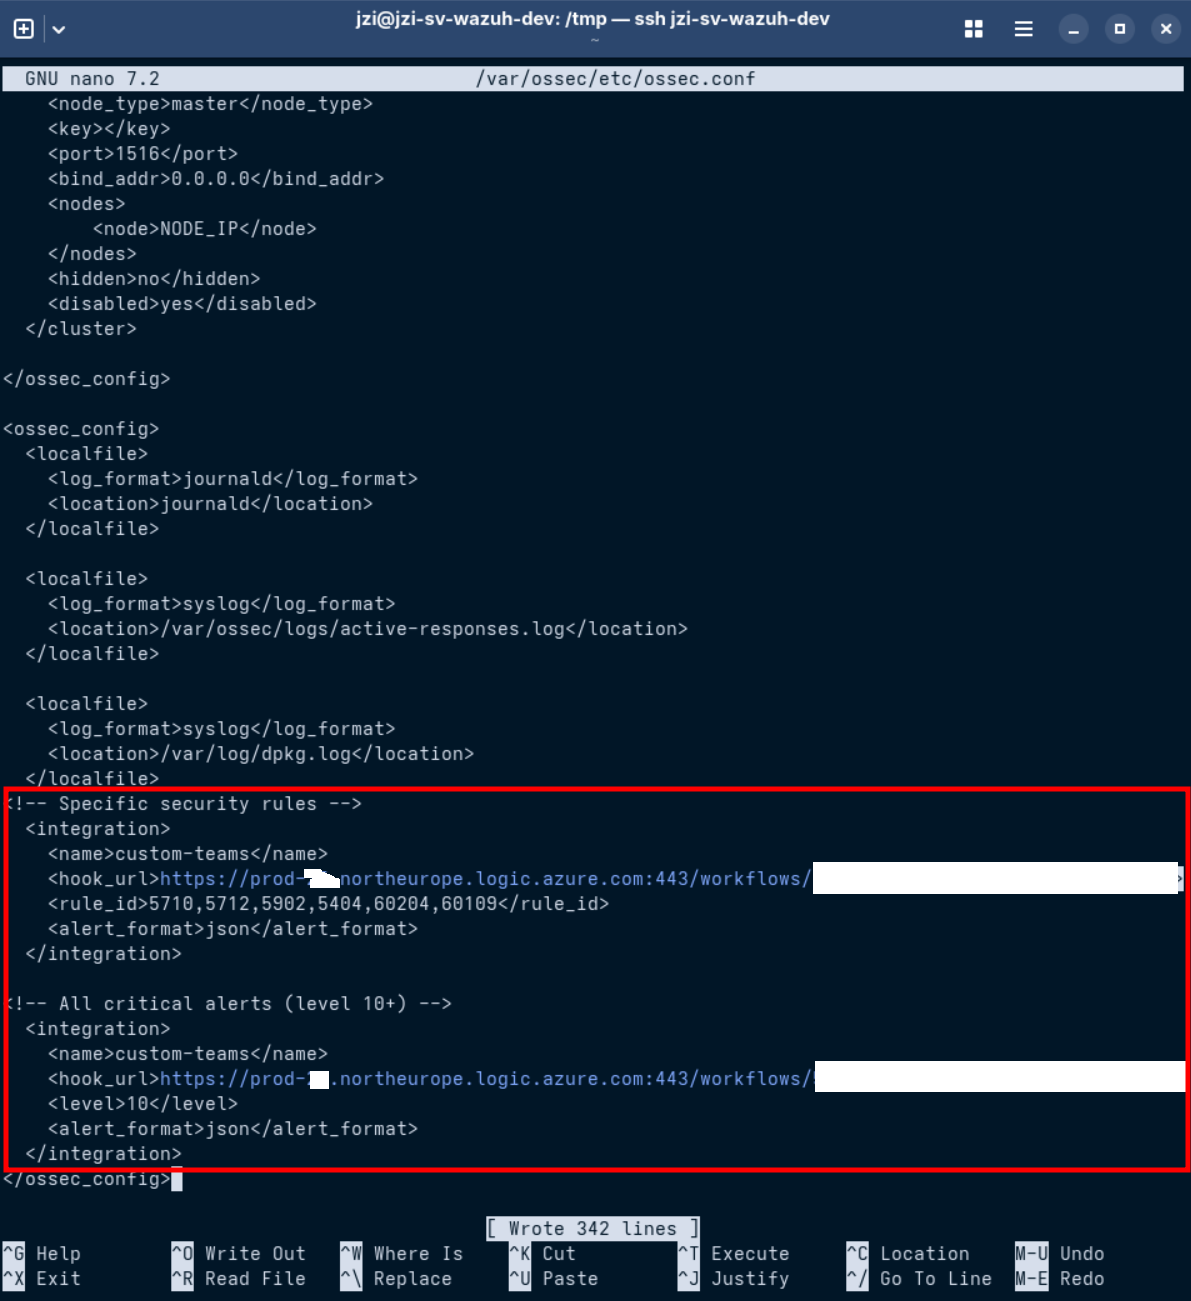
Advanced Configuration (Specific Rules + All alerts level 10+)
In my example, I want Teams to get all alerts from level 10 and above, plus some specific events for Linux and Windows.
Linux: 5710 – Login with a non-existent user 5712 – SSH bruteforce attack 5902 – New user added 5404 – Three failed sudo attempts
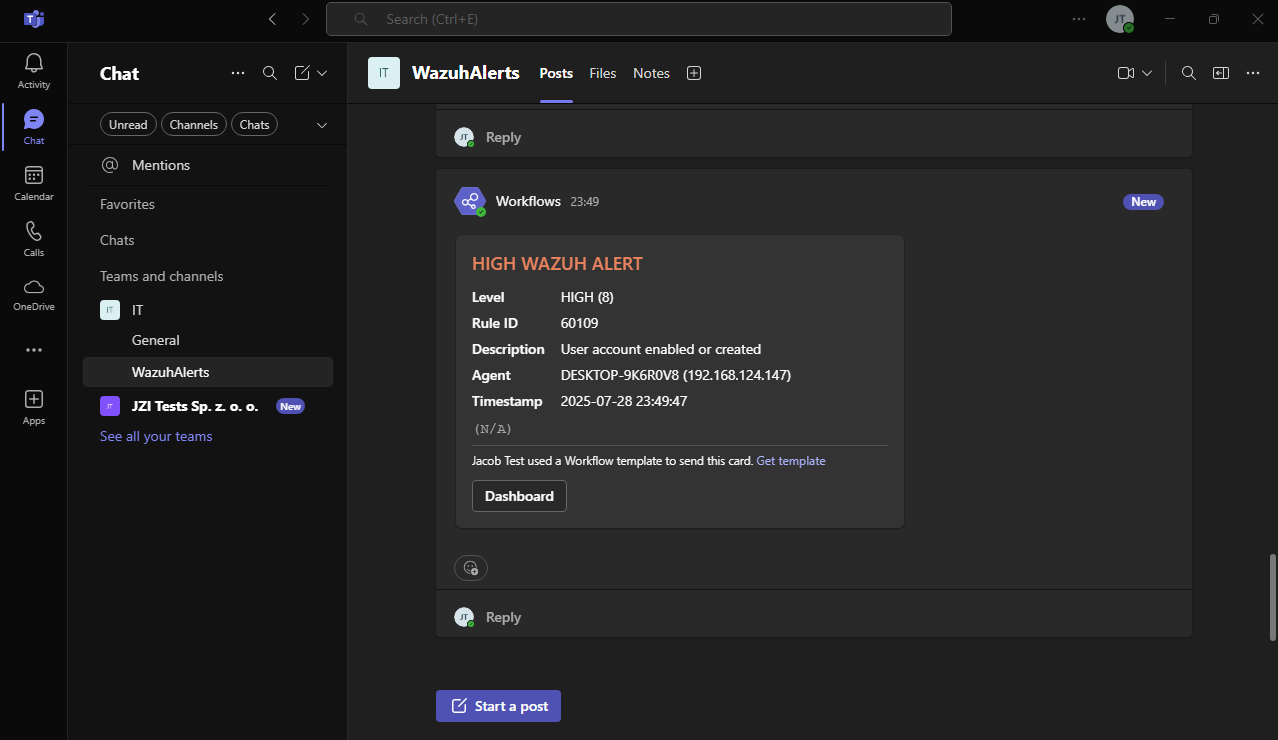
Windows: 60204 – Bruteforce attack 60109 – New user account created
This way, Teams will get both all alerts from level 10 up, and these particular events for Linux and Windows, just as examples.
<!-- Specific security rules -->
<integration>
  <name>custom-teams</name>
  <hook_url>YOUR_TEAMS_WEBHOOK_URL_HERE</hook_url>
  <rule_id>5710,5712,5902,5404,60204,60109</rule_id>
  <alert_format>json</alert_format>
</integration>

<!-- All critical alerts (level 10+) -->
<integration>
  <name>custom-teams</name>
  <hook_url>YOUR_TEAMS_WEBHOOK_URL_HERE</hook_url>
  <level>10</level>
  <alert_format>json</alert_format>
</integration>
Step 2: Save & Restart Wazuh Manager
sudo systemctl restart wazuh-manager
Testing the Integration
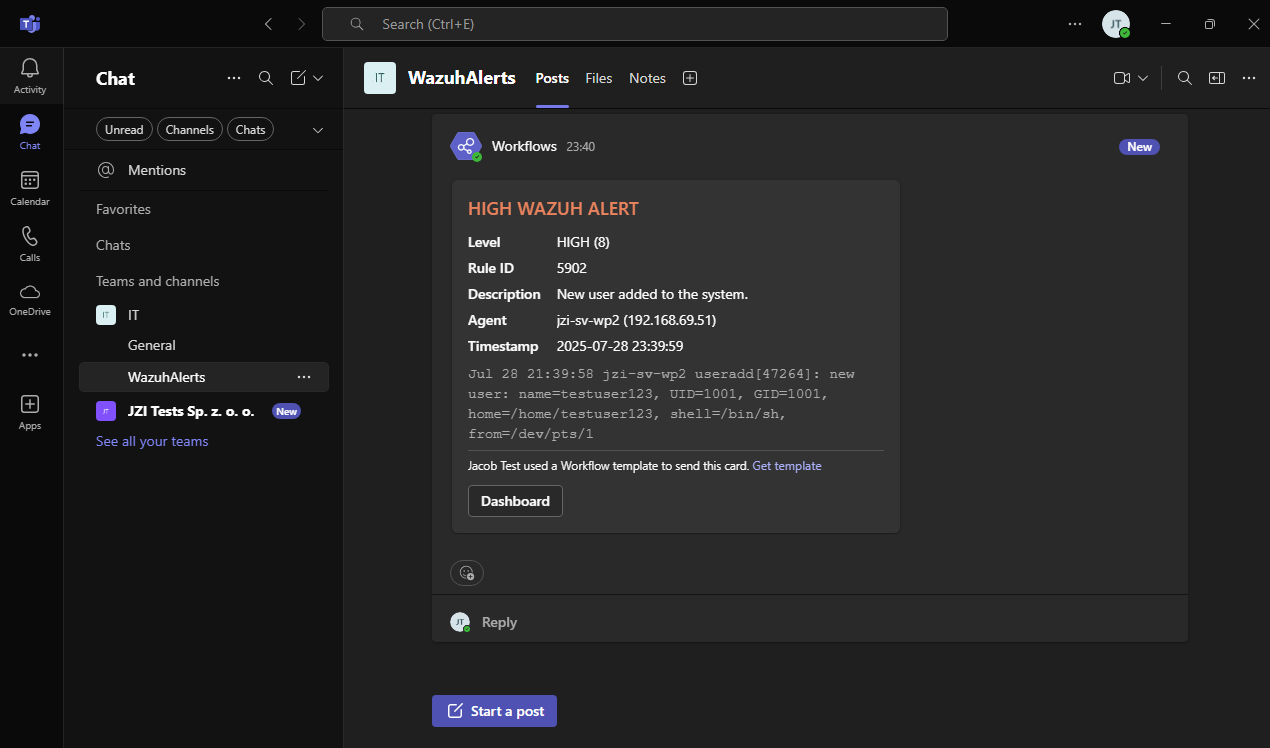
Generate Alerts for Linux rule 5902
In my case, I prepared two agents to perform the tests. One VM with Windows 11 Pro and the other VM with Ubuntu Server 24.04 LTS.
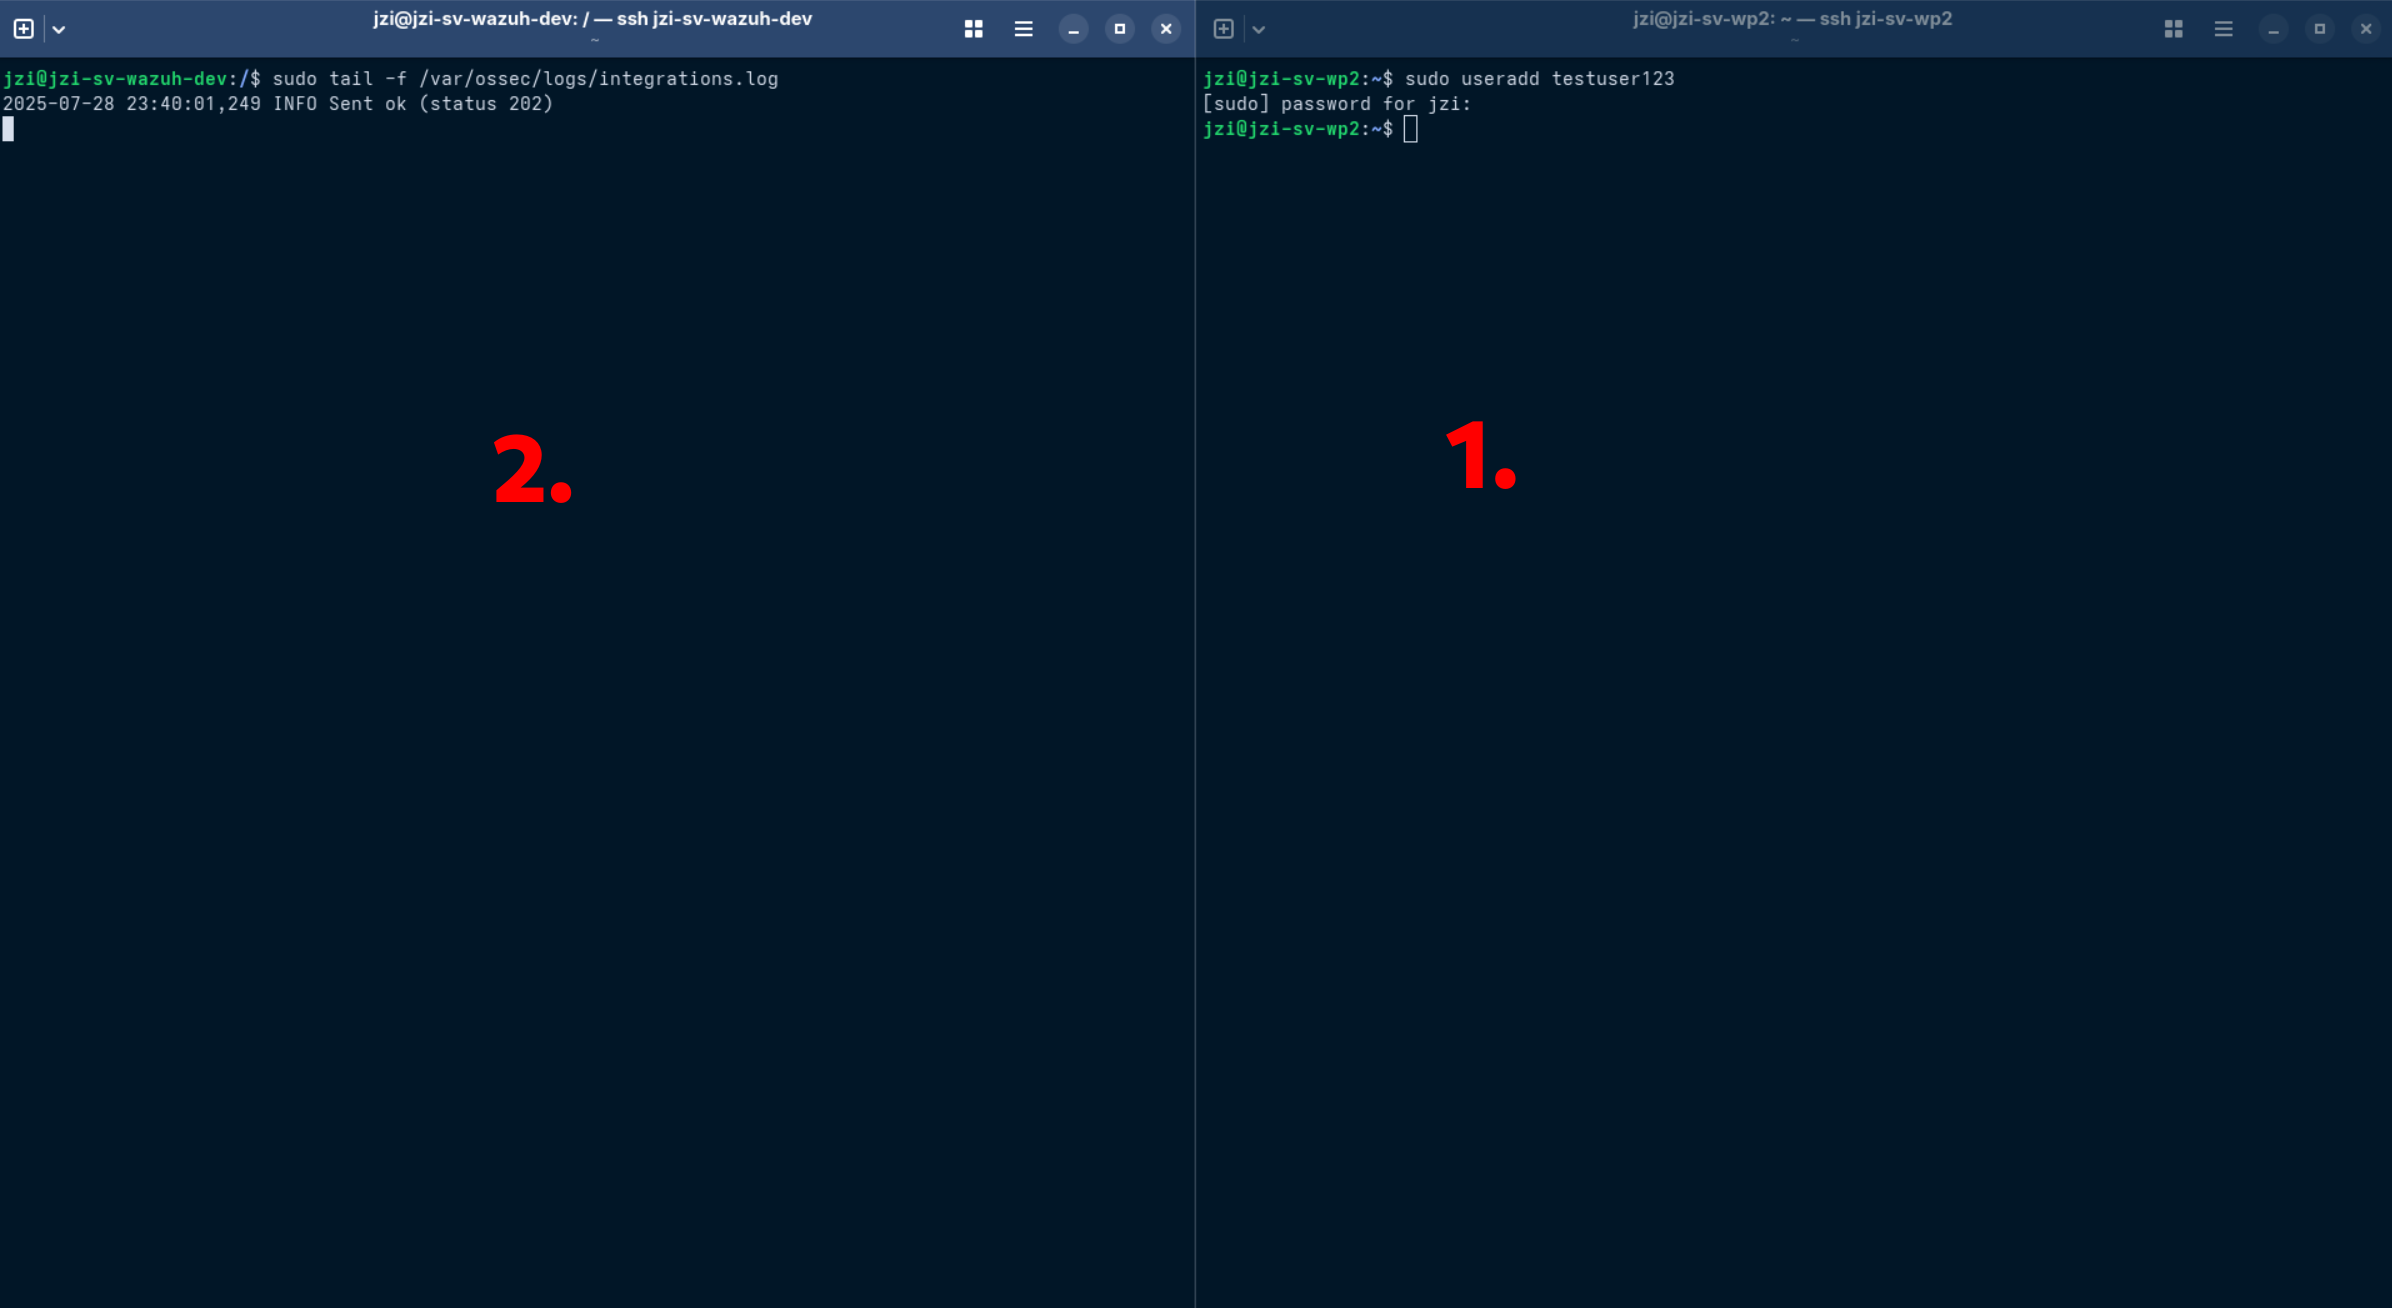
Create a test user on Linux Endpoint to trigger rule 5902:
sudo useradd testuser123
On Wazuh-Manager you can check integration logs:
sudo tail -f /var/ossec/logs/integrations.log
Expected log output:
2025-07-28 19:30:00 INFO Sent ok (status 202)
 Check alert in Microsoft Teams Channel:
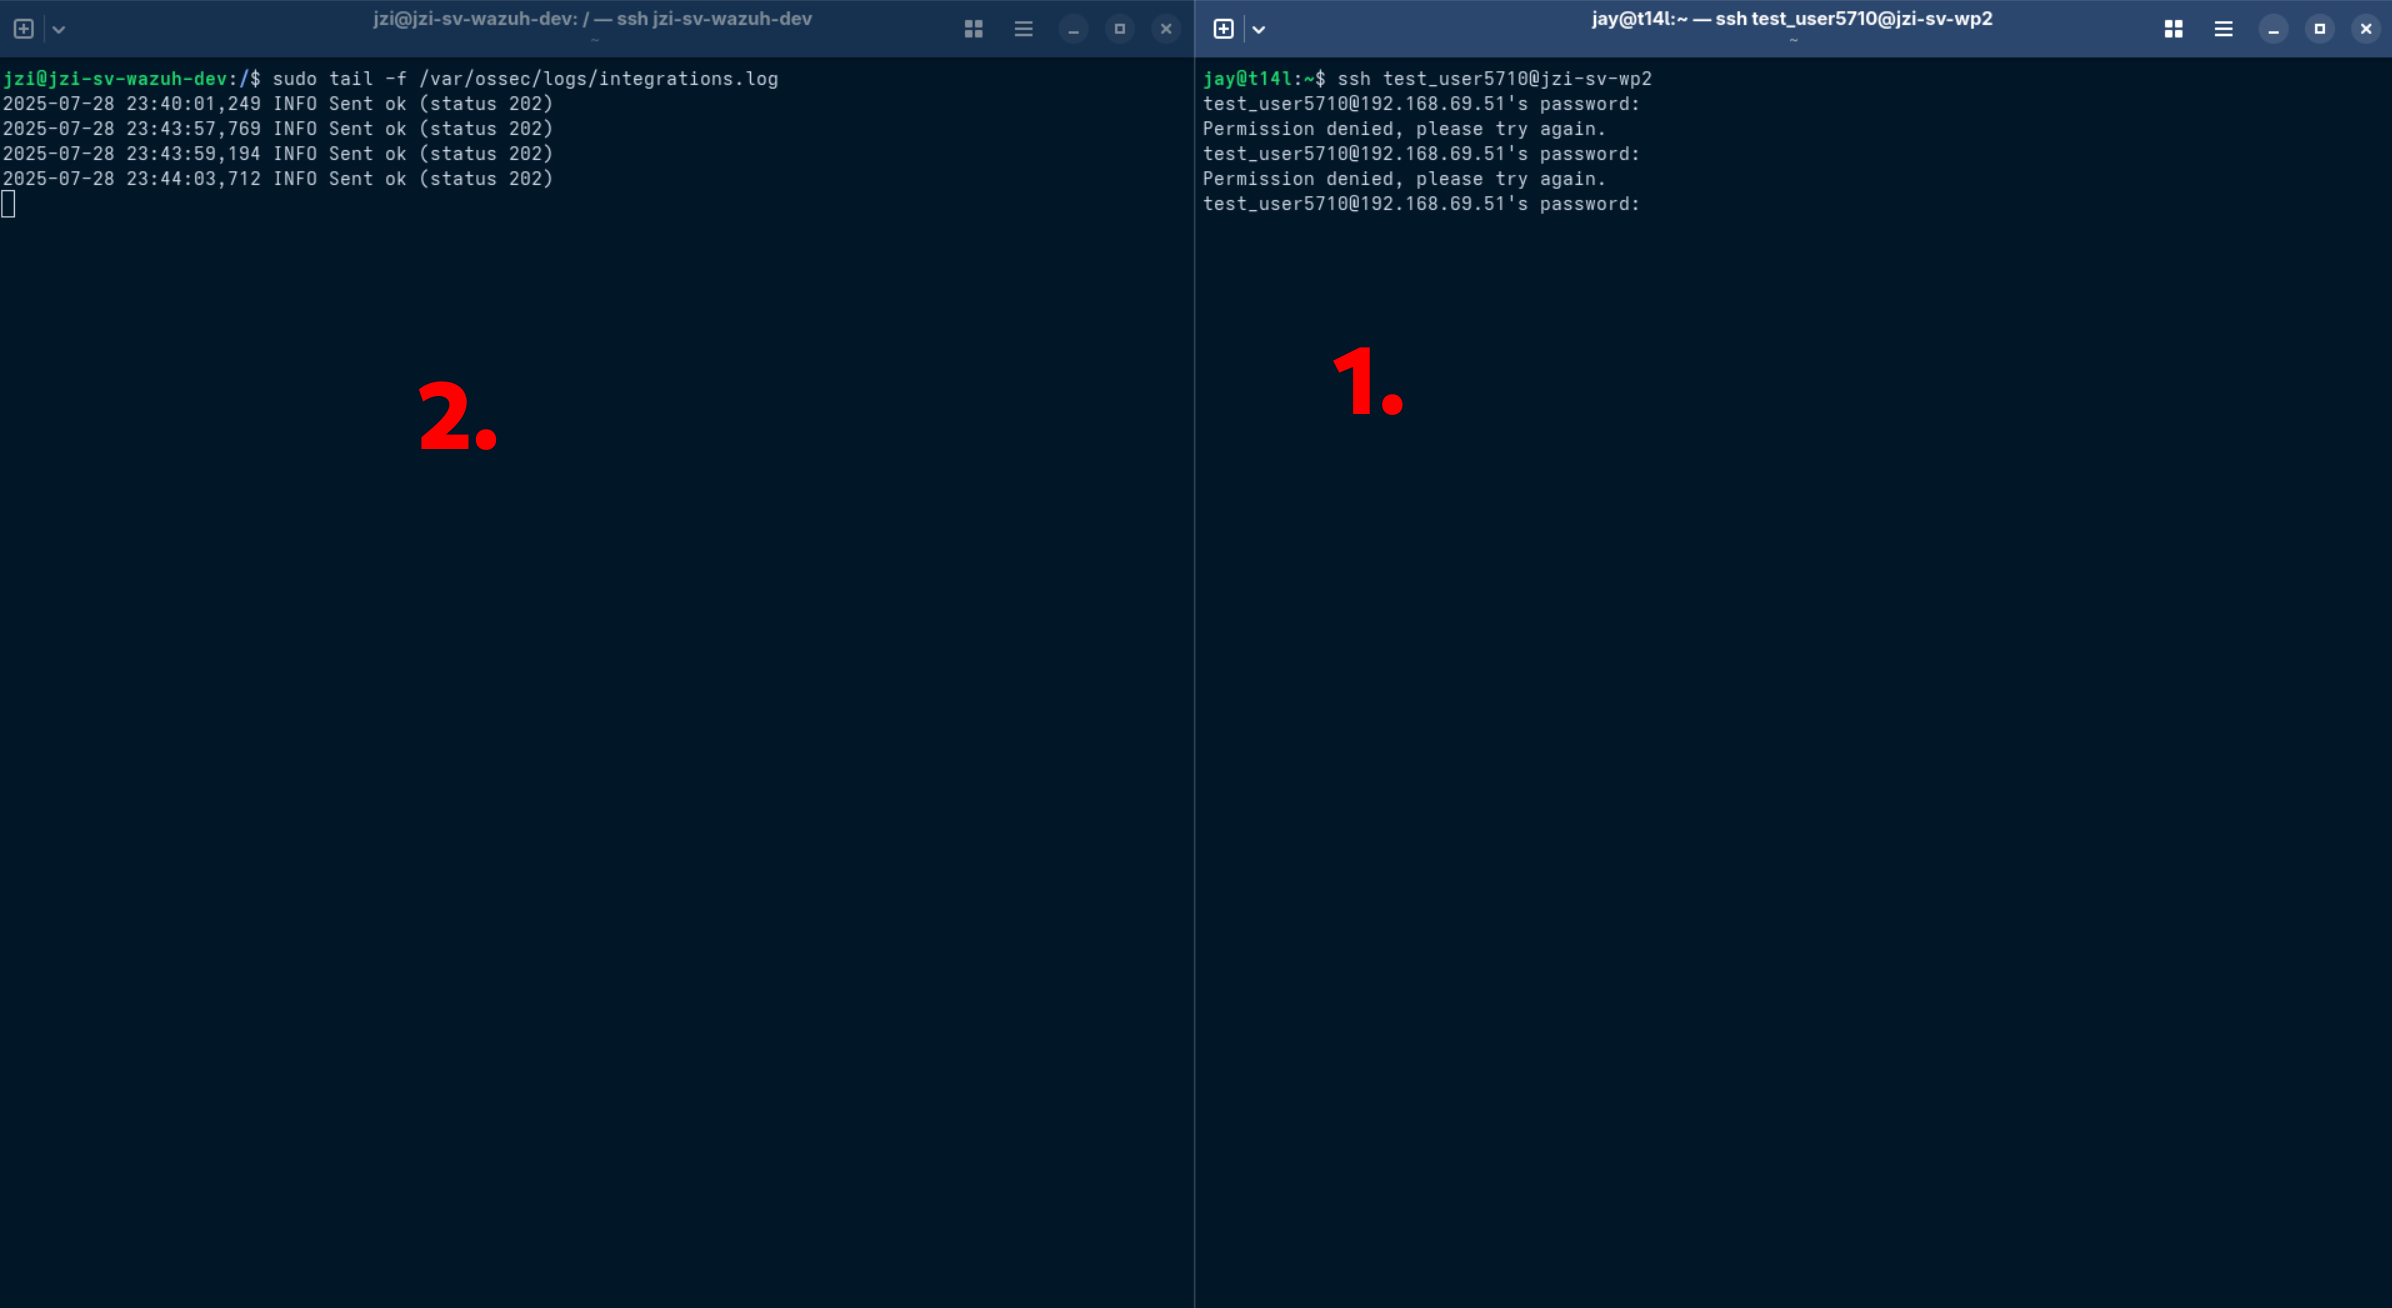
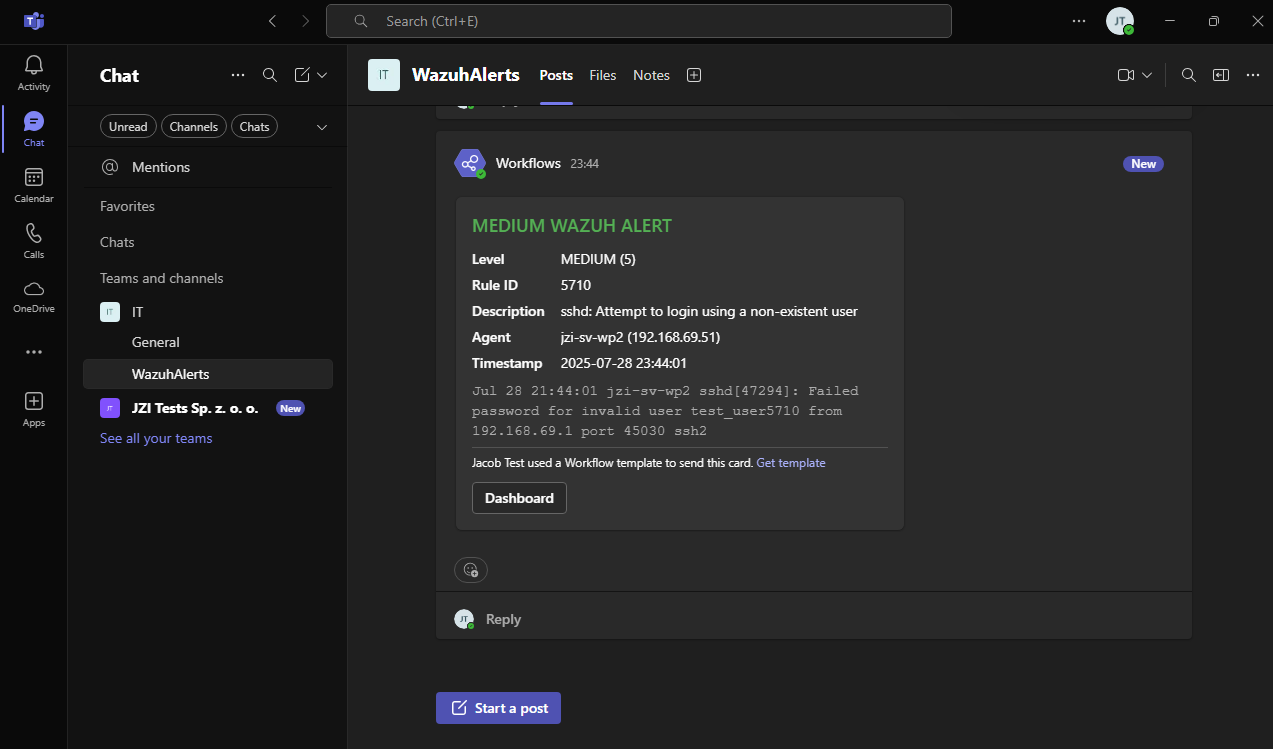
Generate Alerts for Linux rule 5710
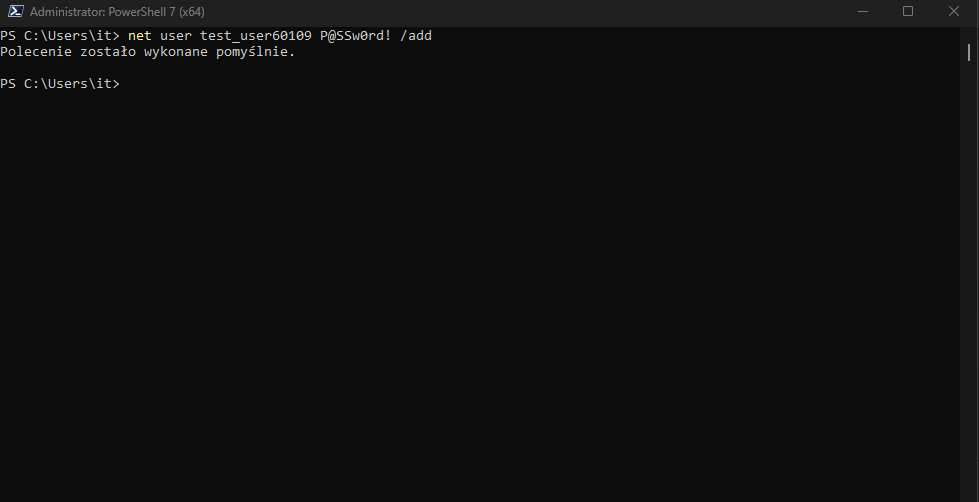
Generate Alerts for Windows rule 60109
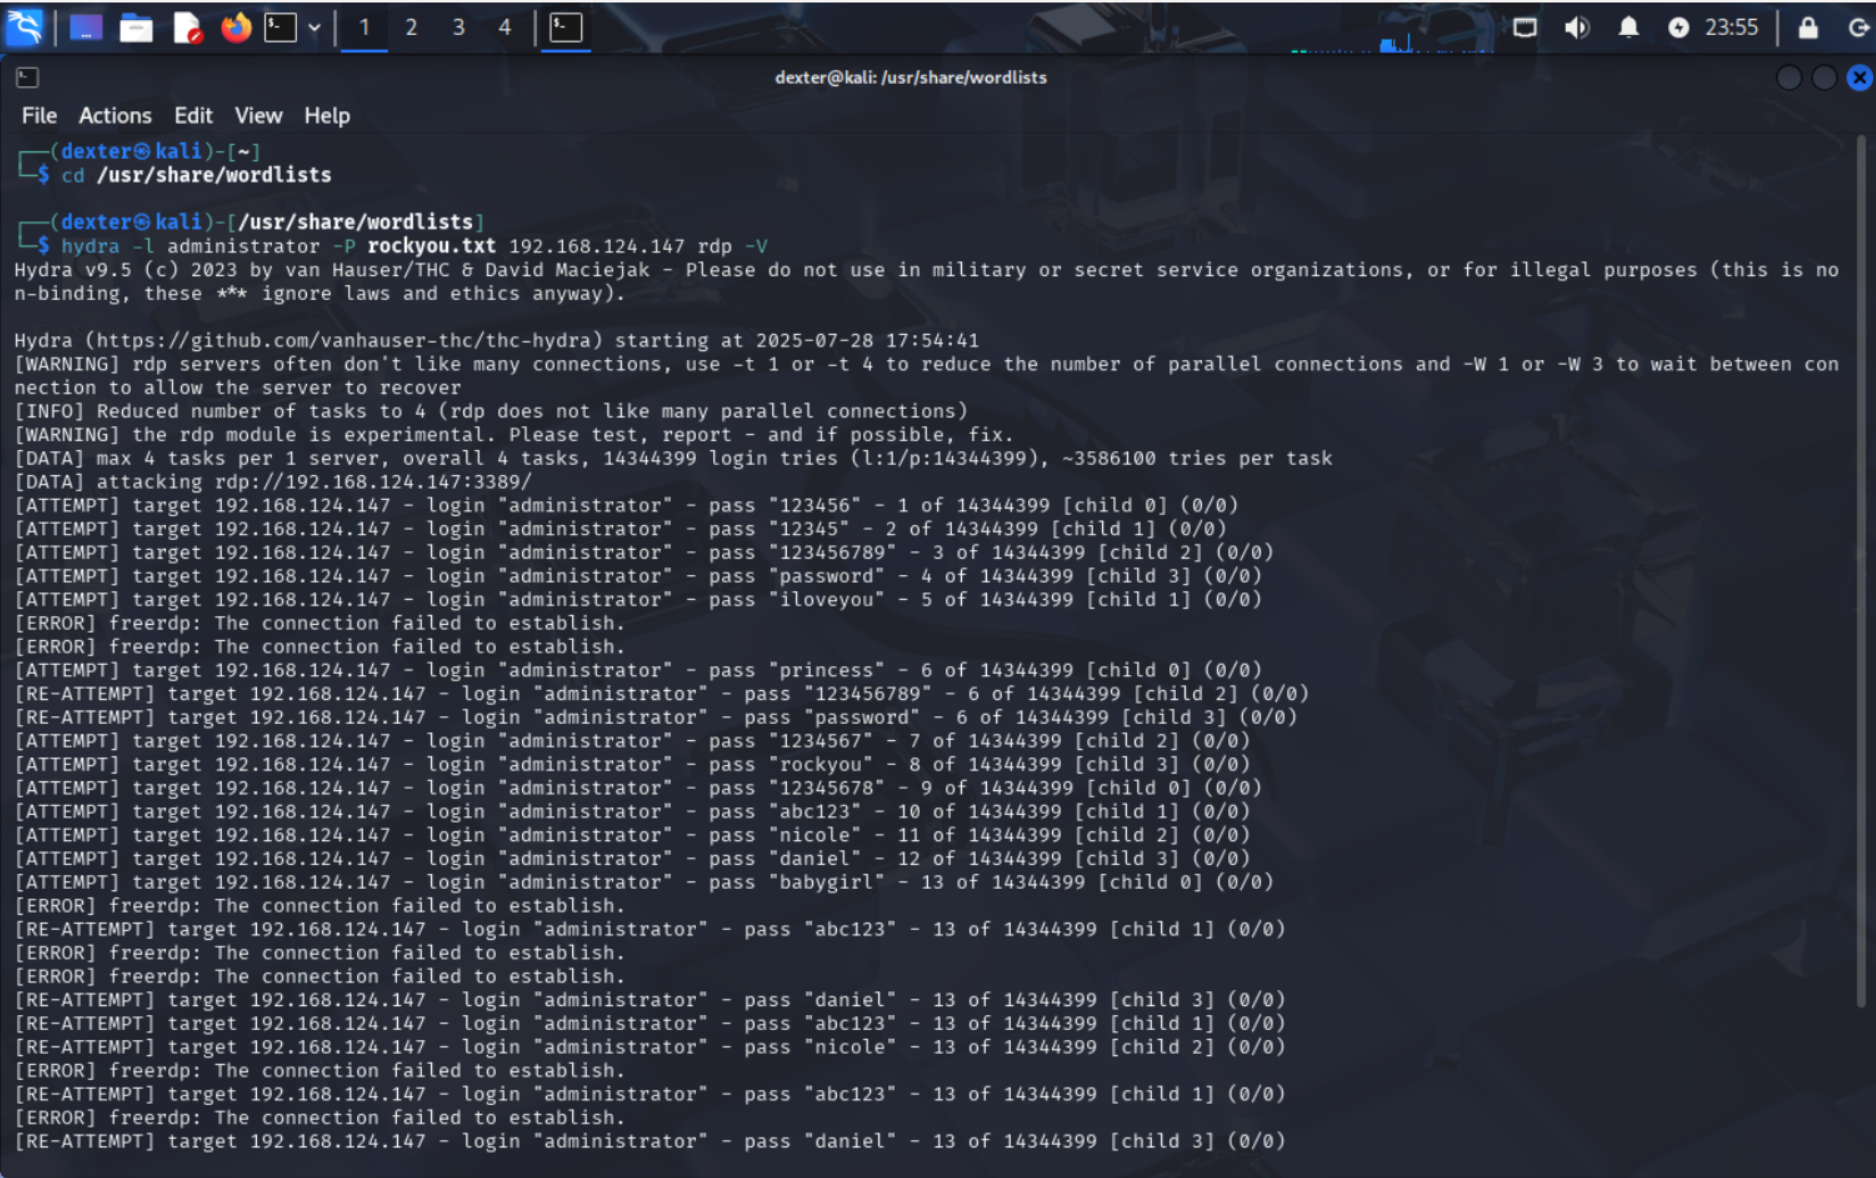
Generate Alerts for Windows rule 60204
We will perform a test RDP bruteforce attack as shown in the screenshot below:
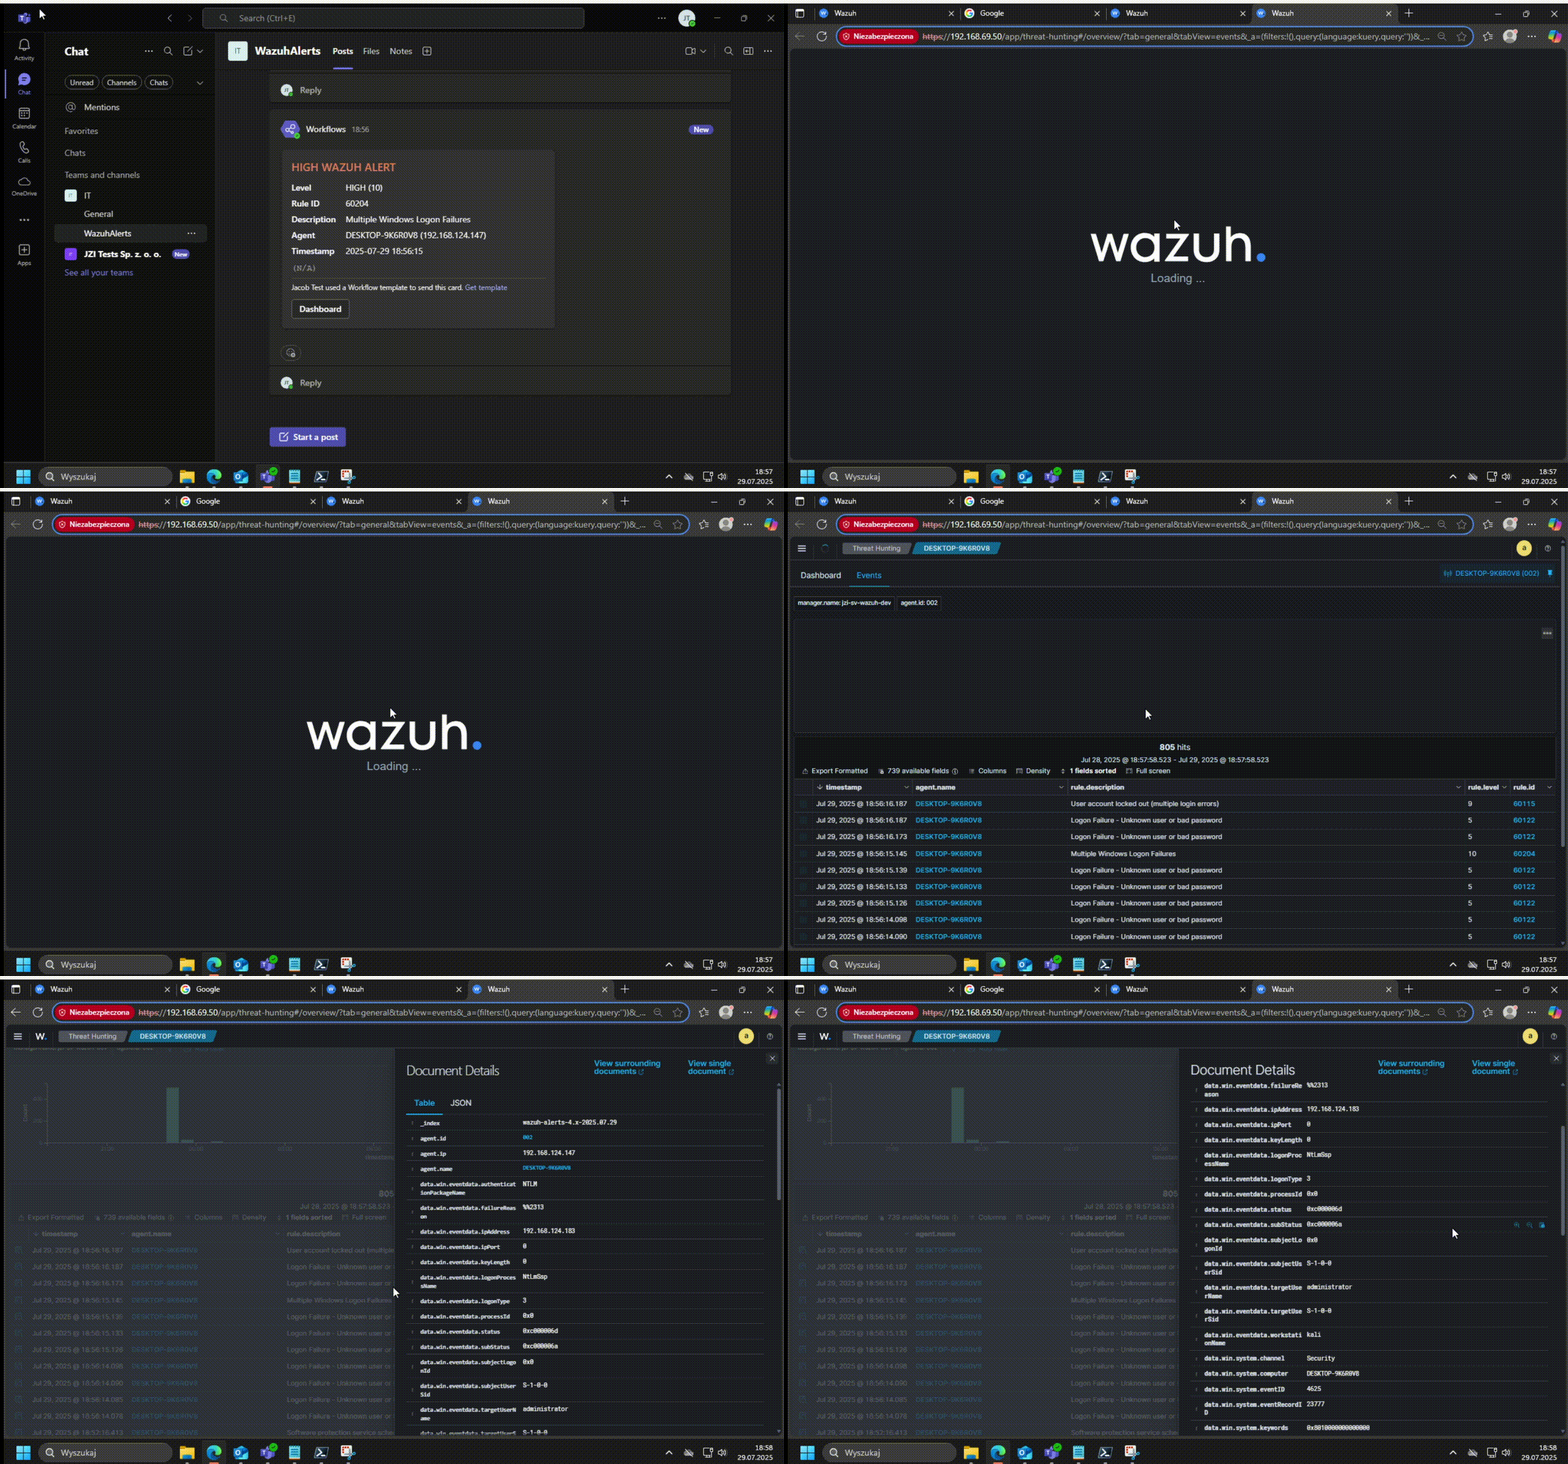
When you click the "Dashboard" button in Teams, you will be redirected to the "Threat Hunting Events" section in Wazuh, automatically filtered to show events for the agent related to the alert.
Support
- GitHub Issues: Report bugs or request features
- Wazuh Community: Wazuh Community Forum
- Documentation: Wazuh Documentation
Contributing
Contributions, feedback, and pull requests are welcome! Please open an issue or create a PR.
